
Insulating doors and windows: weatherstripping and thermal curtains to save money

Why heat escapes through doors and windows and how that makes you spend more.
Air leaks that you can't see, but you can definitely feel.
Yes: insulating doors and windows with weatherstripping and thermal curtains can help you save money because it reduces the entry of cold air and prevents heat from escaping so quickly. It's not magic, but when there are gaps, loose frames, or closures that no longer seal properly, the improvement is usually noticeable.
The problem is that many heat losses are not visible to the naked eye. You don't need a broken window to lose comfort. A small gap in the frame, a sliding door that doesn't fit properly, or a front door with a light at the bottom can be enough to allow cold air to constantly enter.
This is especially noticeable in winter because the heating system works longer to compensate for the heat loss. In practice, you not only feel the house is colder, but you also need to turn on the heater earlier, raise the temperature higher, or keep the heating on for longer.
In houses and apartments, I usually notice these losses first in three areas:
- front door, especially on the lower edge and sides;
- sliding windowsbecause many leave a small gap in the encounters;
- living room and bedroom windowswhere the cold is felt more due to the surface and poor sealing.
Important note: a person doesn't always notice a "strong draft." Sometimes what they feel is a colder area, a curtain that barely moves, or a feeling of cold that quickly returns even after the room has warmed up.
When is the problem related to sealing, and when is it indicative of a major improvement?
Here it is useful to separate two scenarios.
The first scenario This is when the problem stems from a localized leak.
For example:
- air entering through a crack;
- frame that doesn't fit well;
- window sash with set;
- door that allows passage underneath;
- old, dried-out or deformed stamps.
In these cases, weatherstripping, seals, or bottom sweeps usually make a lot of sense. And if the glass also cools the room considerably, a well-chosen thermal curtain or blackout curtain can be a helpful addition.
The second scenario That's when the problem is no longer just a crack.
For example:
- very old window that vibrates or is out of alignment;
- deteriorated frame;
- closure that doesn't press properly;
- single glazing in a highly exposed opening;
- frequent condensation or a very marked feeling of cold even after sealing.
Simple solutions can help, but sometimes they're not enough on their own. In other words, a weatherstrip improves a poor seal, but it won't fix a severely defective window or replace a more comprehensive upgrade when the entire system is failing.
In my experience, the most common mistake is going to extremes: either doing nothing because "a little air still gets in," or hoping a curtain will fix a poorly sealed door. What works best is starting with the basics: identifying where the cold air is coming in, properly sealing what can be fixed, and only then assessing whether a more significant improvement is needed.
The good news is that, in many homes, the problem does stem from something simple. And when that happens, properly repairing doors and windows can give you a more stable home, less draft, and less need for heating to feel comfortable.
How to detect air leaks before buying weatherstripping or curtains

Simple tests you can do at home
Before buying weatherstripping or thermal curtains, I would do a basic check. The idea is simple: to confirm where the air is coming in and not spend money blindly.
These tests work well:
Run your hand near frames and edges.
Do this on a cold or windy day. Slowly walk around the perimeter of doors and windows. If you notice a colder area or a gentle draft, that's a clear clue.
See if any light is coming in through any cracks.
On doors, this is most noticeable at the bottom edge and sides. If you see light, there's also airflow.
Look at the curtain or a light piece of paper.
Move it closer to the frame or the joint between the sashes. If it moves even without a fan or an open window, there's probably a leak.
Check the closure and the pressure when closing.
If a window closes loosely, vibrates, or doesn't seal properly against the frame, the problem may lie there. The same applies to doors that don't close evenly.
Check the condition of the old stamps
If they are dry, flattened, peeling, or cracked, they are no longer sealing properly.
In my experience, this quick check prevents the most common mistake: buying the right solution for the wrong problem. Sometimes people think of thermal curtains, but the real leak is under the door. Or they buy thick weatherstripping when the problem was a misaligned door panel.
What to check first on the front door, living room windows and bedrooms
I would start with these areas, because they tend to be the most noticeable in winter.
Front door
Check first:
- lower edge,
- sides,
- encounter with the frame,
- sensation of current when nearby.
If air is entering from below, the problem usually becomes apparent quickly. This is one of the most common issues and one of the most worthwhile to correct first.
Living room windows
Here's something to look at:
- joints between leaves,
- slides that don't fit properly,
- large frames or windows,
- areas where the curtain moves or the glass cools the area considerably.
In the living room, it's also usually felt more because it's a large space and you spend more time there.
Bedroom windows
Review:
- side frames,
- closing,
- bottom edge of the sheet,
- feeling of cold near the bed or curtain.
In bedrooms, the leak is often not detected by a strong draft, but because the room cools down quickly at night or it is difficult to maintain a feeling of warmth.
My practical recommendation is this: start with the front door and the window where you feel the coldest , not the whole house at once. This way you can better identify which changes are truly worthwhile and what solution you need in each area.
When is it appropriate to use weatherstripping, seals or bottom sweeps
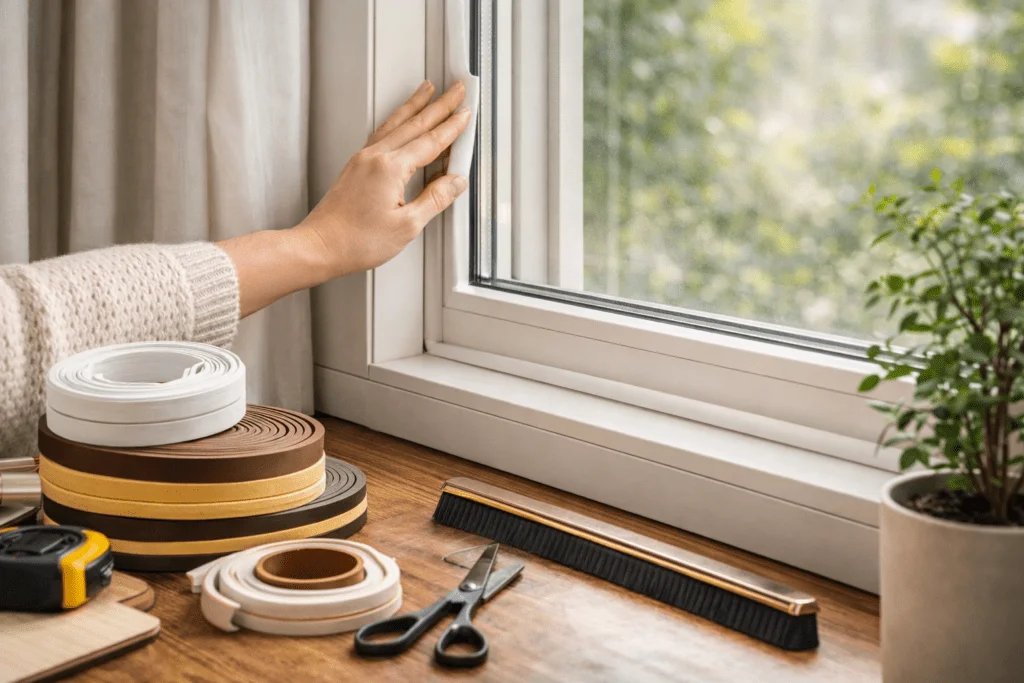
Doors: side slits, bottom edge and frame
In doors, these solutions are useful when the problem is an air leak through clear gaps , not when the door leaf is severely deformed or the frame is poorly installed.
Side or perimeter weatherstripping
They are useful when air enters from the sides or top. They work well if the door closes, but doesn't seal tightly against the frame.
Bottom sweep or door seal
This is the best option when the leak is at the bottom. If, when looking from inside, you see light or feel air at your feet, this is usually the first point to address.
Stamps in the frame
They are useful when the door has small leaks distributed around the perimeter, especially in main doors that no longer exert the same pressure as before.
In my experience, the first leak I usually address on-site is the one around the bottom edge of the front door , because it typically yields a quick and very noticeable result. Often, the perceived draft is significantly reduced with a simple fix there.
Windows: joints, sliding doors and frames with play
In windows, the problem usually appears at the points where one sash meets another, where the closure does not press properly, or where the frame already has play.
Encounters between leaves
If air is getting in through the seam between the leaves, the weatherstripping can help, as long as it doesn't prevent the seal from closing properly.
Sliding windows
These are the types of tires that tend to leak the most air. If there's a small, constant gap, a well-chosen seal can significantly improve the thermal comfort.
Marcos with game
When the problem is between the window and the frame, or in aged joints, perimeter sealing makes more sense than randomly placing a weatherstrip on the sash.
Loose zippers
If the window closes but doesn't fit properly, a seal might help. If it simply won't press or align, it's likely that a simple adjustment will have its limits.
Which solution usually works best depending on the vanishing point
To keep it simple, I would summarize it like this:
- Air under a door: lower sweep or door seal.
- Air through the sides or top of the door: perimeter weatherstripping or frame seal.
- Air at window sash joint: thin weatherstripping or seal, depending on the space and type of closure.
- Air between frame and wall or fixed edge: sealing of the contour.
- Very cold glass surface, but without a large gapThe thermal curtain can help as a complement, not as a replacement for sealing.
The important thing is not to use the same solution for everything. A poorly chosen weatherstrip can prevent the door from closing properly, and a curtain won't fix a clear leak in the frame.
My practical recommendation is simple: first fix the most obvious filtering issue; then add add-ons . That order usually yields better results and avoids unnecessary spending.
How to choose the right weatherstrip without buying the wrong one
Small, medium, or more obvious crack: what changes
The first mistake is usually buying weatherstripping without properly checking the size of the leak. And that's where many solutions fail: either the material is too short and doesn't seal, or it's too thick and the door or window no longer closes properly.
I see it this way:
Small slit
When air barely gets in, a thinner, more flexible seal is best. You don't need to add much "fill" here, just ensure the seal closes properly.
Medium slit
If you already feel a clear current, you need a material with more body, but that still allows you to close it without forcing it.
More obvious crack
When you see light coming in, there's clear play, or the sash barely seals, it's best to choose a more robust solution. And if the seal is still severely compromised, the problem probably wasn't just the weatherstripping.
In my experience, if you're torn between two options, it's almost always best to start with the one that seals without deforming the closure . A seal that's too thick might seem like a "stronger solution," but it often ends up peeling off or causing the door to bounce.
Foam, rubber, silicone or brush: which one is best in each case
Not all materials perform the same. Choosing the right one depends on the vanishing point and the type of opening.
Foam
It's suitable for simple adjustments and small to medium-sized gaps. It's easy to install and is usually one of the quickest options. It works well when you want to fix a minor leak without much hassle.
Rubber
It tends to last longer and withstand repeated use better. I think it's a good option for doors and windows that are opened and closed frequently, provided the thickness is correct.
Silicone
It can work very well when you're looking for a more flexible and durable seal, especially in closures where you need a good fit without making the contact too hard.
Brush
It usually makes more sense on the bottom edge of doors or at certain points on sliding doors, where friction and movement make that format more practical than a compact strip.
My practical approach is this:
- all with doors with air passage at the bottomI usually look first at sweeping or brushing;
- all with sides and framesFoam, rubber, or silicone usually work best depending on the looseness;
- all with sliding windowsIt is advisable to consider a material that seals without hindering sliding.
Common mistakes when choosing thickness or material
This is where the most money is lost.
Choosing "by eye" without checking the slit
If you don't carefully check where the air is entering, you might end up buying the right material for the wrong place.
Buy too thick
This is one of the most common mistakes. The door or window starts to close poorly, requiring excessive force, and soon the material becomes squashed, detached, or simply gets in the way.
Buy too soft for an obvious leak
In that case, it seems installed, but the air still enters almost the same.
Use the same type throughout the house
It doesn't always work. The front door, a sliding living room door, and a bedroom window don't necessarily need the same solution.
Thinking that more material is always better
No. The important thing is that the closure is firm, even, and functional.
Something I always recommend is starting with a problematic opening and testing it there before buying for the whole house. That way you can see if the thickness, material, and closure actually work for you.
Thermal and blackout curtains: what they help solve and what they don't

Regular blackout vs thermal curtain: they are not exactly the same
It's important to clarify this from the start: blackout curtains and thermal curtains are not the same thing, although they are sometimes sold almost as if they were equivalent.
Standard blackout curtains are primarily designed to block light. They might offer some warmth, but their main function isn't to restrict heat exchange.
Thermal curtains , on the other hand, aim to provide an extra barrier against both cold and heat. They typically achieve this with a denser fabric, lining, or a construction designed to reduce heat transfer through the opening.
Simply put:
- if your priority is darken, the blackout already contributes;
- if your priority is improve thermal comfortIt's worth looking at a solution that's really designed for that.
In my experience, many people buy blackout curtains expecting to fix a cold window or a draft, and then feel the improvement was less than expected. Not because the product is bad, but because it was addressing a different need.
When do they help in winter and when do they not replace a bad seal?
Yes, they do help, especially in winter, but it's important to understand how they help.
They work best when the problem is:
- cold surface sensation on the glass;
- loss of comfort near windows;
- rooms that cool down quickly in the evening;
- need to complement an already reasonable seal.
There, the curtain can provide a more stable thermal sensation, especially at night and in spaces where the glass cools the environment considerably.
But there is a clear limit: A curtain won't fix a gap..
If air is entering through the frame, a sliding door with play, or under a door, a curtain can somewhat alleviate the discomfort, but it doesn't replace a proper seal. First, the leak must be fixed; then, if necessary, the curtain can be added as a complement.
I always explain it like this:
The weatherstripping blocks airflow; the curtain helps improve the comfort of the entire opening.When used in the correct order, they usually give better results than when a single solution is expected to do everything.
If you want to see more practical ideas for getting through winter without increasing your heating usage, you might find "Saving money in winter without turning up the heat: layers, seals and morning sun" helpful.
Where they are most noticeable: large windows, bedrooms and living room
They are not equally noticeable in all openings.
Windows
This is where they are most often felt. There is more cold surface area, and if the closure is also faulty, comfort quickly drops in the surrounding area.
Bedrooms
The improvement is usually felt at night and upon waking. A good curtain can help the room cool down more slowly, especially if you've already fixed any leaks in the frame.
Living
It's also usually quite noticeable because it's an area where you spend more time still. When there's a large or sliding window, a well-chosen curtain can make the space more comfortable, especially at dusk and in the evening.
My practical recommendation is this: if you're on a tight budget, start with the opening where you feel the cold the most when you're standing still . That's where you'll quickly see if the change was worth it.
The best combination to spend less on heating without major construction work
Main door: sealed + bottom cut
If I had to prioritize just one point in many houses and apartments, I would start with the front door . It's usually one of the most obvious and annoying sources of leaks.
The combination that usually works best here is this:
- side and top sealing, if there is airflow through the frame;
- bottom sweep or door seal, if the cold air enters from below.
Why does this combination work well? Because it targets the two points where air tends to leak most easily. And when that's properly corrected, the feeling of draft quickly diminishes.
From my experience, this is one of the most appreciated improvements: it doesn't require major construction and it's noticeable right away, especially in hallways, living rooms and areas near the entrance.
Cold windows: weatherstripping + suitable curtain
In windows, the most useful thing is usually to combine solutions , not to bet everything on just one.
If there's a leak around the window frame, sash, or joint, the first step is to install the correct weatherstripping or seal . Then, if the glass is still making the room too cold, a well-chosen thermal curtain or blackout blind can help improve comfort.
The correct logic is this:
- First, you seal the air leak;
- then you improve the thermal barrier of the opening.
That order matters. If you install a good curtain, but air is still leaking through the frame, the improvement will be limited. On the other hand, when the sealing is already reasonably good and you add a useful curtain, the environment tends to remain more stable.
This is very noticeable in:
- living room windows,
- bedrooms exposed to the cold,
- Sliding windows that cool the area even though they don't have a large visible slit.
What should you do first if you have a small budget?
If the budget is tight, I wouldn't spread the expense across the entire house from the start. I would do this:
First: fixes the most obvious leak
The main door or the window where you feel the most air.
After: Improve the opening where you spend the most time
For example, the living room or the master bedroom.
Then: Add the curtain where it actually contributes
Not just any window, but where the glass cools the environment the most or where the room loses comfort the fastest.
My practical recommendation is this: start with what lets air through; then improve what still feels cold even though it's sealed . That order usually yields better results than just buying curtains or filling the whole house with weatherstripping indiscriminately.
The key is not to do everything at once. The key is to first fix what cools the house the most, at the lowest possible cost.
Mistakes that cost you money even if you've already installed weatherstripping or curtains
Stick on a dirty or uneven surface
This mistake ruins many installations from day one. If you stick a weatherstrip over dust, grease, loose paint, or an uneven surface, it will most likely peel off quickly or not seal properly.
Before installing, it is advisable to:
- clean the frame or the sheet thoroughly;
- dry the surface;
- Check for any raised areas, moisture, or old adhesive residue.
In my experience, the problem is often not the weatherstripping itself, but the surface where it was attached. When the surface is poorly prepared, it may appear to be installed correctly, but air continues to leak in or the material comes loose after a short time.
Choosing a thickness that prevents proper closure
This is another very common mistake. The person notices a leak, buys a thick weatherstrip thinking it will seal better, and ends up with a door or window that squeaks, rubs too much, or no longer closes evenly.
When that happens, two things occur:
- the closure loses comfort;
- The material gets squashed, runs, or peels off prematurely.
The key is not to add "more" weatherstripping, but to use the correct thickness . It should seal, yes, but without forcing the door shut. If the door needs too much force to close, something was chosen incorrectly.
Relying solely on the curtain when the leak is in the frame
Curtains can help a lot with the feeling of cold, but they don't replace a clear leak in the frame, where the leaves meet, or at the bottom edge of a door.
Simply put:
- if the problem is air enteringFirst, it needs to be sealed;
- if the problem is cold surface or loss of comfortThe curtain can complement it.
I always recommend that order because it prevents unnecessary spending. A good curtain placed over a poorly sealed window improves the atmosphere somewhat, but it doesn't correct the root cause. First, you stop the leak; then you improve the overall situation.
Forgetting humidity, condensation, or basic ventilation
Sometimes doors and windows are sealed, but the house still feels uncomfortable because the problem wasn't just the cold air. There could also be dampness , condensation , or poorly managed ventilation.
That becomes noticeable when:
- the windows are wet in the morning;
- There's a smell of confinement;
- The atmosphere remains cold even though it no longer feels like a draft;
- Dampness appears on frames or corners.
In these cases, insulation helps, but it's important not to forget the basic balance between sealing and ventilation. If you want to delve deeper into this, you might find " Dehumidify and ventilate: less humidity, less kWh for heating" helpful.
My practical advice is this: if you've already sealed it well and the comfort still doesn't improve as you expected, check for humidity and condensation before spending more money on additional accessories.
How much savings can you expect and when are these solutions no longer sufficient?
When is less heating use noticeable?
You may notice less heating use, but let's be realistic: these improvements help more when the house loses heat through obvious leaks or highly exposed windows , not when the main problem stems from poor overall insulation.
It's usually more noticeable in these cases:
- Main door with obvious air passage;
- sliding windows or frames that don't fit properly;
- living room windows that cool the environment considerably as evening falls;
- Bedrooms where the temperature drops quickly at night.
When you fix a real leak, what usually changes first is not so much the bill immediately, but the feeling of comfort : less electricity, fewer freezing areas and less need to turn on the heating so early or leave it running for so long.
In my experience, that's the key point. Often, the first benefit isn't "spending half as much," but something more concrete and believable: the house feels more stable and it takes less effort to keep it warm . And when that happens, it can indeed translate into less heating use over time.
What I don't recommend is promising big savings just by installing weatherstripping or curtains. They help, yes, but their effectiveness depends on:
- how much leakage there was before;
- In what area of the house is the problem?
- how much heating do you use;
- and how exposed to the cold is that opening.
Signs that the problem can no longer be solved simply with seals or curtains
There are situations where these solutions improve things somewhat, but they are clearly not enough on their own.
Some typical signs are these:
- You still feel very cold even though you sealed it well.;
- the window or door has excessive play;
- the closure does not press properly;
- The frame is deformed, damaged, or very old.;
- There is frequent condensation and a feeling of very cold walls or glass.;
- The environment loses temperature very quickly even without clear drafts.
The problem there may go beyond just the sealing. There could be a very poor opening, single-pane glass in a highly exposed area, or a structural issue that can't be fixed with accessories alone.
I always recommend looking at this critically:
If air was getting in through a gap and you fixed it, great. But if after that the window opening is still very cold or the seal is still malfunctioning, you're probably looking at a more significant improvement, not just a problem with the weatherstripping.
The idea is simple: seals and curtains are very useful when the problem is correctable and localized; they cease to be sufficient when the entire assembly is failing.
Quick checklist to better seal your house this week
What to do today
If you want to notice an improvement without getting bogged down, I would start with this:
- Check the front doorCheck if light is coming in from below or if you feel air on the sides.
- Run your hand over the coldest frames: especially in the living room and bedroom.
- Identify a single priority opening: the one you feel most when you're still.
- Check the current status of the stampsIf they are dry, flattened, or peeling, they are no longer doing their job properly.
- Decide if the problem is air or a cold surface.:
If air gets in, the first thing to do is seal it;
If clear air doesn't enter, but the area gets very cold, the curtain can help as a complement.
In my experience, when someone tries to do "everything at once," they end up overbuying and making few corrections. What works best is to address the most obvious leak first.
What to review during the next 7 days
During the week, the idea is to organize the problem properly and not act impulsively.
- Day 1–2: Correct the opening where the leak is most noticeable.
- Day 3: Check if the door or window still closes properly after the adjustment.
- Day 4: Observe if the sensation of draft or icy area has decreased.
- Day 5: evaluate whether that opening also needs a thermal curtain or a better blackout curtain.
- Day 6: Check a second area, ideally the living room or bedroom.
- Day 7: Note what improvement was noticeable and what point remains weak.
The goal isn't to make your house perfect in a week. The goal is to identify, correct, and determine which changes truly provide more comfort while minimizing expenses.
If you want to turn this into a more organized improvement, this might be useful. 30-day savings plan: weekly goals and simple tracking.
And if you also want to add simple, low-cost changes, check out 20 habits to lower your electricity bill without spending money.
Frequently asked questions about weatherstripping, seals and thermal curtains
Not always. They work in both cases, but they're not chosen in the same way. For doors, the bottom edge and the frame are usually very important. For windows, the type of opening, the way the sashes meet, and how the frame closes are more crucial. That's why it's not a good idea to buy the same style for the whole house.
It helps somewhat, but not always in the same way. Regular blackout curtains are primarily designed to block light. If you're looking to improve thermal comfort, it's worth checking if it's truly a thermal curtain or a fabric designed more for insulation. And even then, it doesn't replace a poor seal.
First, check if the material was chosen correctly and installed properly. Often, the problem lies in an incorrect thickness, a poorly cleaned surface, or a leak point other than the one you expected. If you've already sealed it well and air is still getting in, the closure, frame, or the entire opening may need more extensive repair.
Yes, absolutely. In winter in Santiago, these improvements often make a lot of sense, especially in apartments and houses where you feel a draft through the front door, sliding windows, or large windows. They don't replace a structural upgrade when needed, but they can help you spend less on heating and improve comfort.
When you've already fixed simple leaks and the window is still very cold, the closure doesn't fit properly, there's excessive play, or the frame is deteriorated, the problem may be more than just a weatherstrip or a curtain.

I'm Stevenson, better known as Steve the Poet . I'm a poet and writer, and I own a digital marketing agency , bignegro.com . I'm also an electrician with over 10 years of experience. I studied electricity at Salesianos Don Bosco and worked my way up from assistant to foreman of a 10-person crew. Today, I lead a small business.